Overview Instructions

Show Hide

Welcome to the 2015 DiscoverDesign.org National High School Architecture & Design Competition!

This year's real-world design problem is to design a pocket park for your neighborhood or school. Click to view the 2015 rules and entry guidelines and registration. 

Check out the 2015 Top 10 Winners!

Design Challenge Background

Pocket parks have the ability to activate under-used or open spaces, and turn them into vibrant community spaces. No matter where they pop-up, they provide a unique place for people to gather, rest, play, or escape the hustle and bustle of the day. Cities across the country have been creating more and more pocket parks to bring neighborhoods to life & create a positive sense of place and pride for their community. A pocket park is a small park, typically build on a single vacant lot or on a small irregular piece of land, that is accessible to the general public.

Design Challenge Brief

 
Design a pocket park for a small piece of land near your school or in your neighborhood. Your design needs to provide spaces for groups to gather, spaces or activites for multiple age groups, and should be no bigger than 14,500 square feet. What might a park look like that is designed with community needs in mind, as opposed to a one-size-fits-all design?

A standard lot size in Chicago is 50'x125'. You could occupy two Chicago lots, adjust the dimensions, or find a lot in your neighborhood that does not exceed the square footage. Can't find an open space? Redesign one!

Your design should include a variety of elements that make a park... a park! From benches, bike shelters and meeting spaces, to playgrounds & pavilions, to cafes, information kiosks, or arts performance areas. You should also consider sustainability issues and the environmental impact of your design.


HINT: Click the little 1, 2, or 3 on the image to get more information and tips throughout the project! 

A pocket park is a small park accessible to the general public on a single lot | Photo courtesyof sourcethestation.com

What should I upload?

For your Overview, it is important to post a short, but clear, ‘success statement’ that communicates the goals you hope to solve and achieve through your design solutions. When you’re nearly finished with your design project, you can go back to this success statement to see if your design has met the criteria you first proposed.

For each step along the Design Process we'll give you some suggestions on what to think about, try out, and upload.

The general area of the designated construction site has been thoroughly researched as of looking at the demographics, physicality of neighborhood, and economic stability. Looking at the general consensus of the amount of income, I found that the area is currently averaging$27,864. This gives me knowledge that this area is below the average than the rest of Las Vegas. From the past three years, the population in the area has been decreasing as well, at a -17.3% change. Three schools surround the area, including an elementary, junior high, and high schools (Advanced Technologies Academy and Veterans Tribute).
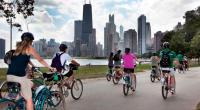
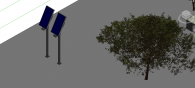
The proximity of these schools is fairly close, all of which interconnect as a triangle around the pocket park. The area does not have a lot of entertainment or a ‘getaway’ place for the residents to go to. Addressing the problem that the area is resulting in low economic and low demographics, however, the aesthetics of 89106 is also at a loss. Spanish colonial and stucco rules over the range. I want to present a more modern look to give it a more up to date feeling.
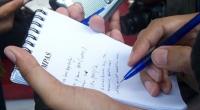
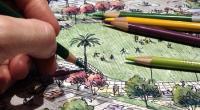
In all, to report these complications I have interviewed local residents, teachers, and students surrounding the area. To get a more physical view of the pocket park I have managed to create a 3D model and video to help one understand the aesthetics of the site. Also incorporating adaptive reuse, eco-friendly installments, reuse of biofuels from plastic waste, and wind turbines, I have succeeded to create a healthy environment as well. I will originate the requirements for the pocket park as well as including creating creative notions based off the general area.

Comments

Dear FaithInMe. I've enjoyed reviewing your project. Much of the text you include in the Overview actually belongs in the Collect Info stage. But kudos to you for this type of research and for contacting other architects/designers/ park planners around the country for ideas!
.
But I struggled to understand where your park was located. Is it in a dense neighborhood? Outside the city limits? Near housing or schools? By not identifying a specific location for your park, you've lost the chance to use the existing pocket site to help inform your design decisions. And this shows up in your final model, because it has no context (it's sort of floating in space now). What's around it? Which way is north? How does it connect to the neighborhood? It's important to show this.
.
I do like your use of various environmentally friendly elements throughout the park and the research you did to choose them! Keep up the good investigation work. It will serve you well in college.

I really appreciated your outreach and all of the process that went into your design. I would encourage you to utilize the space of your park a little more. If you engage the outside boundaries of your park, all of the fun happens in the middle. When all of the fun in bundled in the middle, the outside grassland just becomes something you have to cross to get there.

I love your enthusiasm for incorporating eco-friendly design into your park. A little more exploration into how form can meet function would do your park wonders! Solar panels can get incorporated in really unique ways.

Keep up the great work, and thank you for all of the evidence you uploaded to show me your process!

Collect Instructions

Show Hide

Upload a quick sketch of your ideas! | San Francisco park sketch, photo courtesy of ArchitectureForHumanity.org

Collect Information

In the Collect Info step of the design process, you try to gather as much information as possible about your existing school or community parks and spaces, along with the students, staff and neighbors who will use it.  You can't propose new solutions until you figure out and document what the existing problems are.

What makes a park?

No two parks are the same, so what is it that turns a park from just a plot of land to a vital community space? Take a look at parks near your school, home, work, neighborhood, and city! For the Collect Info step of the Design process you'll gather notes, sketches, photos, videos, etc. of your observations and research. 

Try This

  • Walk around your school grounds and a neighborhood park. Take pictures of what makes that space a "park".
  • Visit Flickr or another photo sharing site and search for types of parks. Determine good and bad examples of how parks meet the needs of their community - for all ages.
  • Post images of buildings, colors, designs, textures, or other things that inspire you in this step. Make sure you give credit to your source!
  • Don't forget to explain your thinking in writing for every image you upload! Tell us why it's important and how it's impacting your thinking.

Think about

  • What kind of outdoor spaces does your school have? Would you consider them a "park"? Why or why not?
  • What kind of parks are in your community? What do you like or dislike about them?
  • Who uses parks? How do different people use parks? Do they all use them the same way or differently?

Colorful sheltered playground at Fuji-Hakone-Izu National Park, Japan

What types of structures do parks have?

No two parks are the same - each is designed with a specific community and use in mind. Therefore, there are many different types of activities and spaces for people of all ages to enjoy and interact with. Here are a few ideas to kick start your research (Hint: these are great words to search in Google Images!).

Adventure playgrounds

While professional designers used to play a major role in the design of playgrounds around the world, the playground often seen today is a primary-colored collection of plastic equipment with predetermined uses, leaving little room for children’s imaginations. Landscape architects such as Michael Van Valkenburgh are now incorporating different kinds of play spaces into their designs, including in the new Maggie Daley park in Chicago. These ‘adventure playgrounds,’ as they are often called, are made of natural materials and sculpted landscapes with abstract shapes and materials, allowing for the most freedom for imagination.

www.toxel.com 

Bicyle Shelters

Outdoor bicycle shelters can be both functional and beautiful in a park space. They offer park visitors a place to lock up their bikes and protect them from the weather.  Great places to store bikes safely and in an interesting way can encourage community members to ride their bikes more, and be sure to make a stop at your pocket park! A company called Park-a-Bike specializes in creating these structures - Learn more HERE!

Ruby Hill Park in Denver, CO | Photo courtesy of levittdenver.org

What types of structures do parks have?

Looking for even more information? What kinds of pavilions or structures have you noticed in parks near you? Have you ever seen a parklet? Here's some inspiration:

Pavilions

Pavilions can be in many forms or functions. Some are simple and protect picnickers from a rainy afternoon. Others are sculptural, outdoor park kiosks, or for community performances

Think about: What kind of pavilion would your neighborhood benefit from? What examples can you find? What do you like or dislike about them? Why?

Once you choose a kind of pavilion, you'll need to think about what it needs to have inside and out. Here are some things you may want to include in your design:

  • public and/or private use spaces
  • bathrooms
  • storage rooms for food, supplies, or winter storage
  • seating for performances or gathering
  • tables and chairs; benches
  • functional spaces based on your specific pavilion: a kitchen, backstage, open outdoor areas, information windows, etc.

www.behance.net

Parklets

Take inspiration from these tiny parks that pop up in unexpected places like parking spots. Many of these parklets are created by community members looking to activate a space in their own neighborhood, and are moveable, foldable, and able to literally pop-up anywhere!

Think about: What do you notice about their use of space? What kinds of activities can they accomodate in just one parking spot?

www.wrtdesign.com

FaithInMe's work for the Collect Information step:

Summary
I have successfully collected data by looking at the demographics of the surrounding area of my floor plan. By doing this I have found the physicality of neighborhood and economic stability.
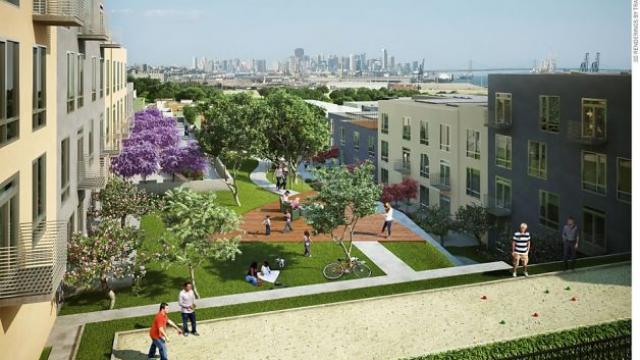
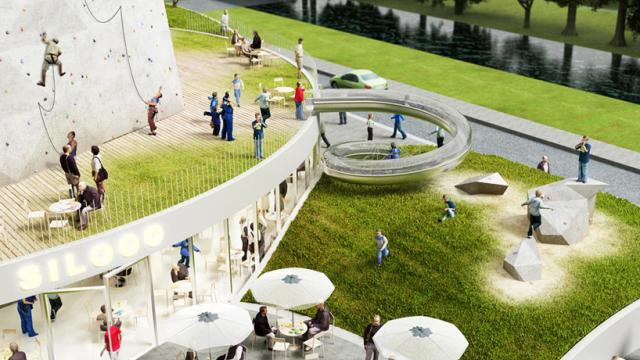
To gather more information about the environmental aspect of pocket parks in Las, Vegas Nevada, I...
Response from Mr. Jarzen
Reply from me
Last response from Mr. Jarzen
Response from Mr. Caro
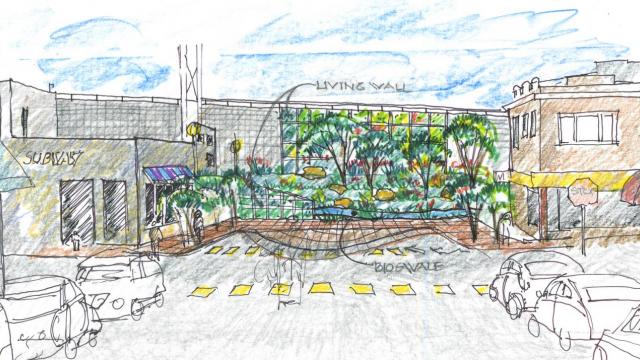
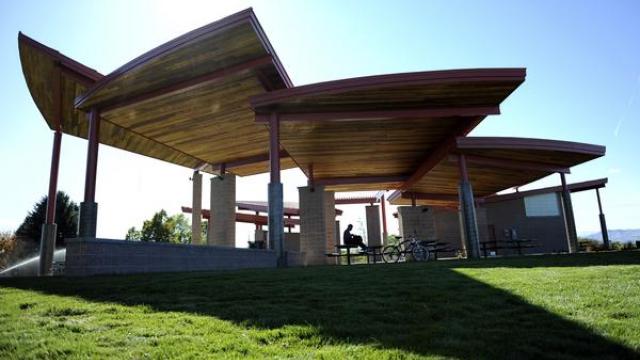
Pro:Having some sort of structure in your design is beneficial to the aesthetics of the pocket park...
The honey comb texture or hexagon tilling has inspired me to reiterate my thinking on the flooring...

Brainstorm Instructions

Show Hide

Silver Spring Metro Pocket Park | Photo courtesy of eleven55ripley.com

Brainstorm Ideas

In the Brainstorm Ideas step of the design process, you will develop ideas from all of the information you've collected. You will start to be inspired by new places and you put some early ideas down on paper that show what you've found in the Collect Info step. You also might take more photos to show specific new ideas you have. 

The simple diagrams you make here will help you understand how the  pocket park location and design compare with your new ideas.

Try This

  • Draw a floorplan or siteplan of your parks existing facilities. How are all of the different spaces connected? What are the different pathways you can take through all of these spaces? Map all of these structures and spaces.
  • Use Google Maps to view and print out an aerial photo of your park. Take measurements of the overall dimensions of the area, of both structures and outdoor spaces and use the aerial to map out the measurements.
  • Post this aerial map and sketch here so everyone can understand the relationship between your school building, the neghborhood, park spaces available, and the proposed site of your new park or redesigned park features. Describe the surrounding area and note existing structures such as paths, seating, bike racks, pavilions, playgrounds, concession stands, and any fences. 
  • On a piece of tracing paper placed over the aerial photo of your school, sketch a diagram showing a large arc around the building to show the path of the sun throughout the day.  This drawing is called a site analysis diagram.  (Remember, the sun rises in the east and sets in the west.)

Landuse Map in Cary, North Carolina | Photo courtesty of townofcary.org

Think About

  • Will your new pocket park replace your school or neighborhood's existing park spaces or become an addition to a different part of the community? Will it be built in an empty lot or space?  Will it be between buildings, out in a field, or built on the roof?  You decide.
  • Spend some time looking at the aerial photo of the area you select.  What types of other buildings surround your the site?  Homes, businesses, parks, parking lots, or an empty field?  How will these other buildings impact the design of your new athletic pavillion? Create a land-use map!
  • What types of streets surround your school? Are they busy or quiet? What types of streets are in your neighborhood? What might be the best place for people to relax and play?
  • Based on the site analysis diagram you've sketched, where is the sun located throughout the school day?
  • How can the structures and outdoor areas of your new pocket park be positioned to take advantage of the sunlight for good lighting?

FaithInMe's work for the Brainstorm Ideas step:

Summary
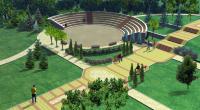
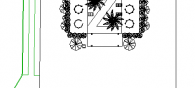
One should believe that a park on this particular site is well fitted for the reasons being that the shape is rather small and elongated at some proportions approriately.
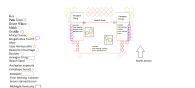
This picture depicts the planting system of my plan demonstrating where the native plants will be...
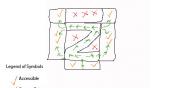
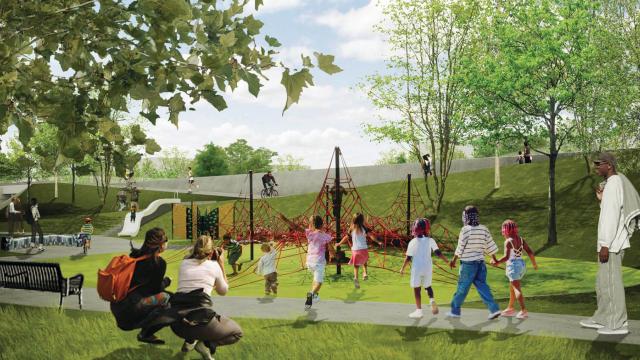
The design demonstrated above is shown as a flow chart demonstrating where the people will walk...
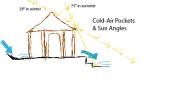
This rough sketch shows how the sun is used in the plan to create less heat, since Las Vegas is one...
Solar panels implanted on the roofing of the shading structures in the front of the site are used...
A windmill/turbine to be implanted in the rear of the site, which produces energy from kinetic...
Rough bubble map sketch to elicit the ideas of where what things will be placed in the pocket park.
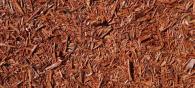
Mulch to hold and sustain plant life and trees integrated in the ground. Helps with drainage,...

Develop Instructions

Show Hide

Pocket Park with Bocce Ball court | Photo courtesy of Lennar

Develop Solutions

You've been gathering all sorts of information, and brainstorming creative options for your pocket park. Now it's time to put all the pieces together and make some final decisions. In the Develop Solutions step, your rough ideas come together with drawings and models that can show others your solutions for a new pocket park.

Try This

  • Try out different ideas and save each “version”. You do not want to lose a good idea later!  Other people viewing your project - other students around the country, your teacher, and mentors - want to see how your ideas have changed over time. This means that while you're working on your digital model, you’ll want to be sure to keep re-saving it with a new file name every few days as you work through the steps.
  • Make a list of your ideas and associated sketches, or practice models. For your final upload you will want to write a short but effective paragraph of your process and what you found. This will inform the direction you will take for the final solution.
  • Show your ideas to your teacher and peers for some feedback. You can also review your progress with the test group you may have interviewed and test whether your design would meet their needs or address their concerns. Learn from the feedback you receive and incorporate into your final design solution.
  • Do not leave work for the last minute! Going through a detailed design process requires time to gather information, develop ideas, and make improvements. This is difficult or impossible if you try to pull everything together a week before your project is due. Projects that are researched, developed, and well executed will always stand out!

CAD rendering of a park space | Photo courtesy of ivarskalvans.blogspot.com.jpg

Think About

  • Are you reaching your success statement? Review your design and test it against your own observations and review that it has met the project requirements. Did it meet the expectations of the end users that you spoke to? Who is in your community?
  • How do you imagine people will interact with your new pocket park? What will your design contribute to the neighborhood? Why? How so?
  • You have designed with community in mind. What role does the community play in any architect's plans? Talk about it.
  • Keep your park full of activity! How will your park be used in different seasons or weather? Have you been imagining different events or programs that could happen here? Tell us about it! (Check out the High Line in the blue sidebar for some ideas...)

FaithInMe's work for the Develop Solutions step:

Summary
In order to achieve my solutions in this process, I needed to know where on my site are elements that needed assistance to import or have background knowledge on.
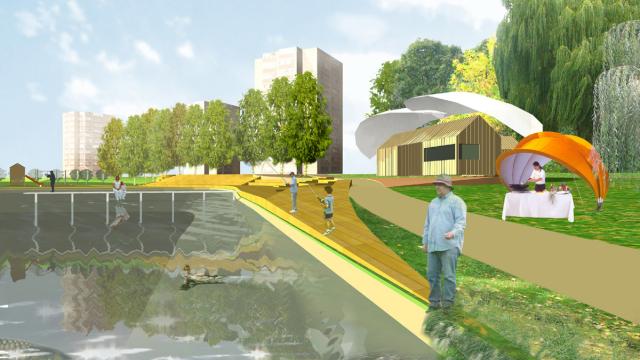
Adding a water feature consisted of knowledge of where exactly to get the water from.Surrounding by...
Implementing Solar panels into the site creates reusable energy for the area, however, attaining...
This collage of different pictures depicts how I found out exactly how many solar panels I needed....
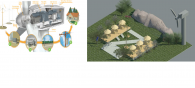
‘Nevada is one of the best states for wind power for two reasons: its abundant wind energy and its...

Final Instructions

Show Hide

Chicago's 606 bike paths and parks transform an old defunct railway | Photo courtesy of the606.org

Final Design

You're almost there! The Final Design step of the design process is to create more finished drawings and models that illustrate your ideas to others. Remember, your explanation text, and the types of drawings, images, and models you share need to tell the whole story of your project to someone who may or may not have ever visited your neighborhood or pocket park site.

Try This

  • Review your design and test it against your original sucess statement that you wrote for the Overview. Does it meet this criteria?
  • You might want to share floor plans, elevations, renderings of your digital model, photos of a physical model, or a video animation of your model.
  • Be sure to comment on other projects in the competition to foster, encourage, and build an online design community of learners in DiscoverDesign. Who knows, they might just have a great idea to help bring your project to the next level!  CAF will also recognize students that provide both encouragement and constructive criticism on students' work throughout the run of the competition.

Multi-use pocket park proposal | Photo courtesy of archreview.blogspot.com.jpg

Think About

  • Does your final design meet the expectations of the students, community members, and/or school staff   that you interviewed?  If not, you may need to go back to the drawing board and revise your design. 
  • For your final design, you will want to post a short but effective paragraph of your process and the unique solutions you found and developed. Tell us about your ideas and how they may or may not have changed over the course of the project.
  • What essential skills have you learned? Think about where you started this class or project and what you know now. Practice writing about this here - it might come in handy for a job or college application!

FaithInMe's work for the Final Design step:

Summary
I have reached my final design by completing the following steps: overview, collect information, brainstorm solutions, and develop solutions.
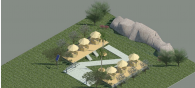
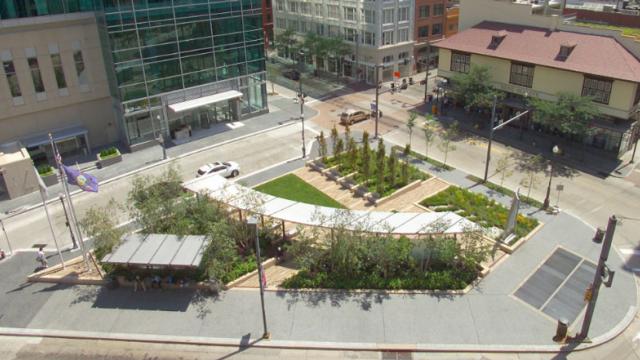
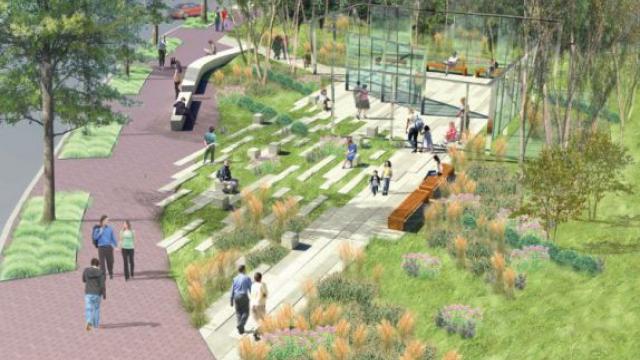
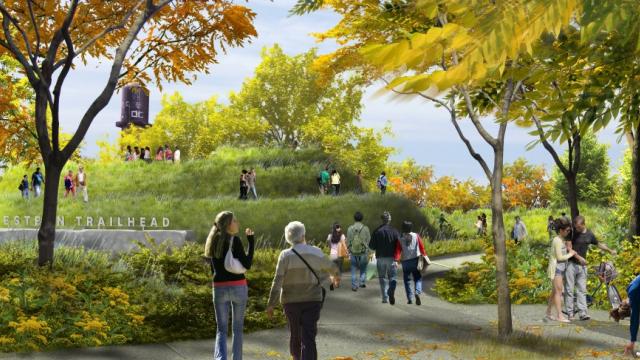
This picture displays a medium rendering of the plan. This gives a more conceptual look of the park...
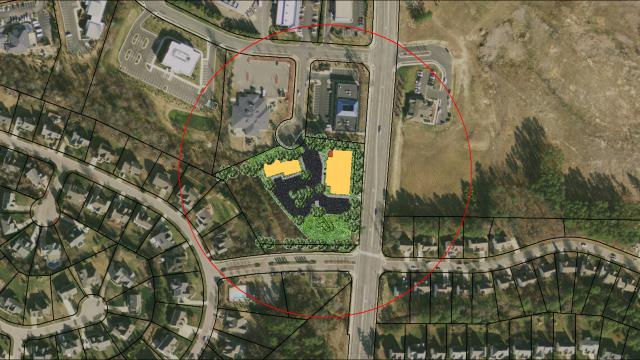
Site Plan of design gives a birds eye view for the audience to show where the park is placed.
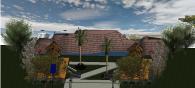
Perspective of where the building will be placed. The purpose of this is to give the audience a...
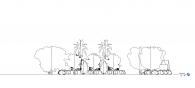
East Elevation view of the site. This gives the client a different perspective showing how...
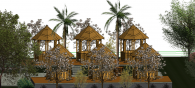
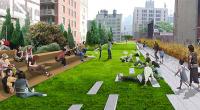
This area of the plan displays the abundant amount of sitting for the community to come and relax...

Earn Skill Badges

Twitter Feed