
The way im going to start my food cart is with finding what vegatables and food the student at my school would like to buy. I would senf out a survey and ask what kind of fruit and healthy food people would it. after i gather the imnformation im going to decide how i put evrthing together and the way i would set up the cart and the objest needing. last im going to decide were to put it and i decided adter looking around the school i would put it by where the soccer court and softball feel becuase its the main entrance and student would be playing sport and tired after the games and practice that they would come and buy from out merchandice and sell quick.
ajasso1's work for the Collect Information step:
The student did not provide any content for this step.
ajasso1's work for the Brainstorm Ideas step:
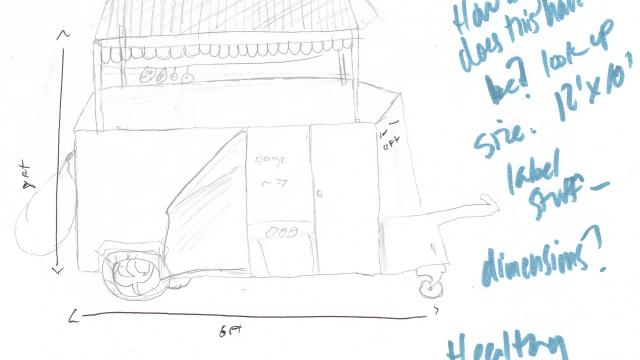
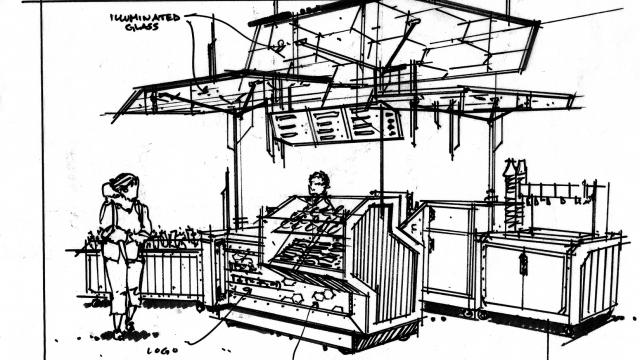
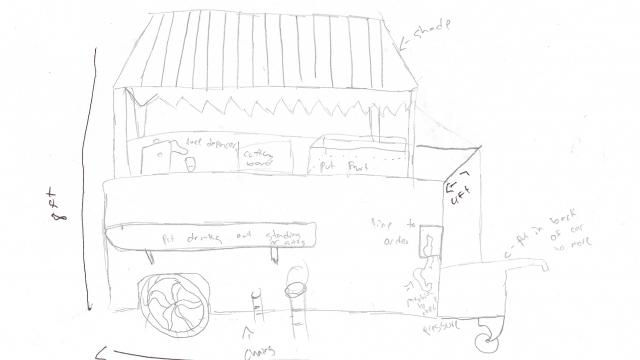
this would be the front of the cart
this would be the back of the cart
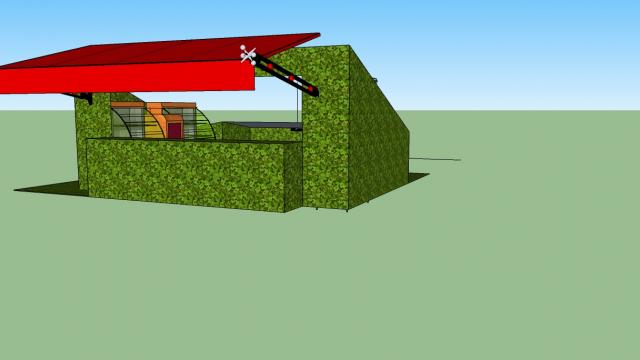
ajasso1's work for the Develop Solutions step:
part of how its coming out
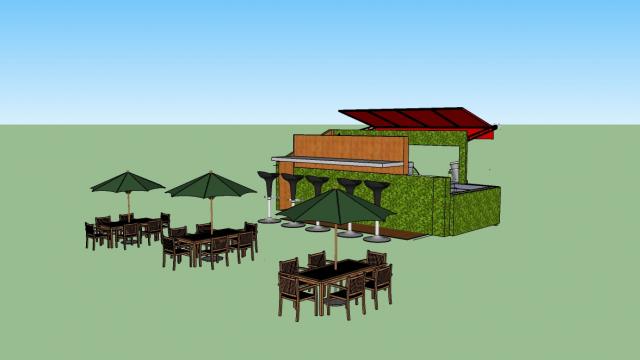
this shows a avertical garden wall to show plants in the outside and give it a more eco firendly place
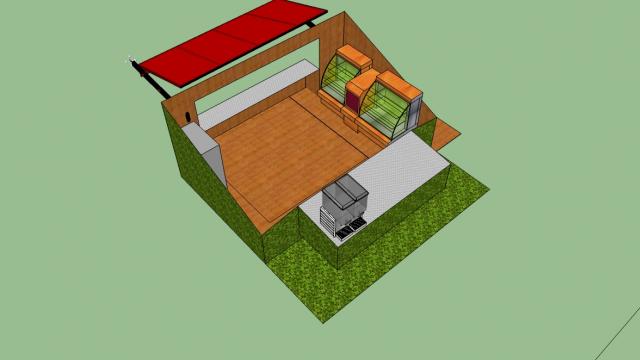
as you can see is that everhting inside will be made of recycle wood and the counters will be made from recycle metal
i made couple changes and more smaller so it would be easy to move and settle in. also i added a bar and tables

side view of the fridge, frezzer, cutting table, water maker and the fruit juice maker and the bar

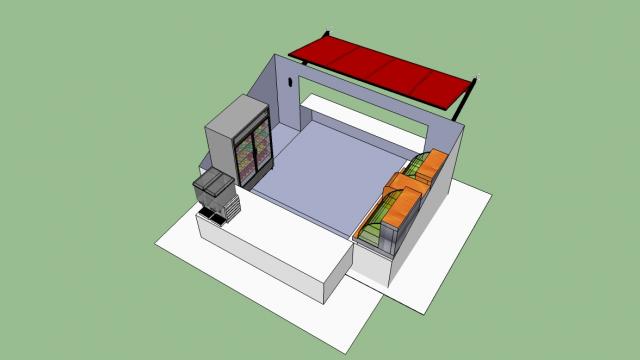
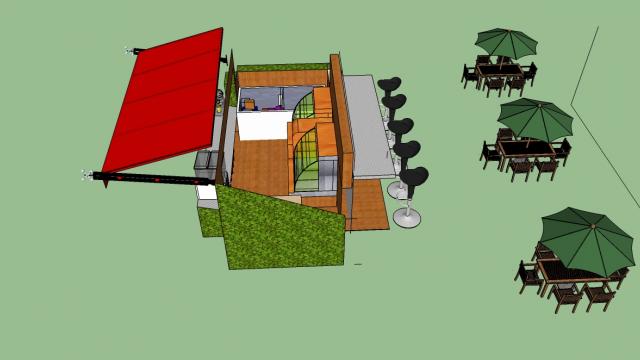
ajasso1's work for the Final Design step:
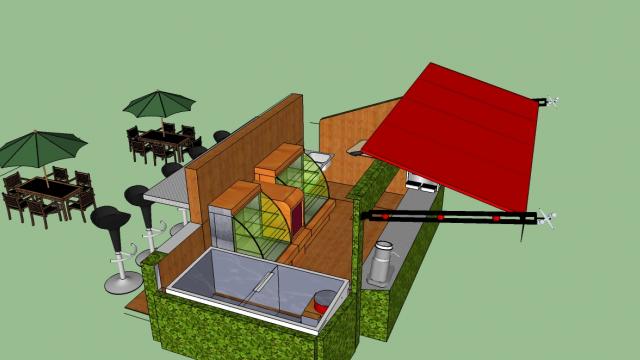
you can see the frezer were kids can pick ice cream, also a firdge to store fruit & drinks and the bar and tables to sit
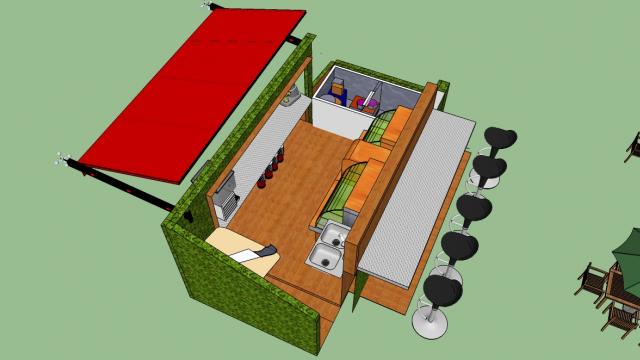
you can see the sink for the workers, the cutting board for the fruit, under the counter for storage, the counter juice maker
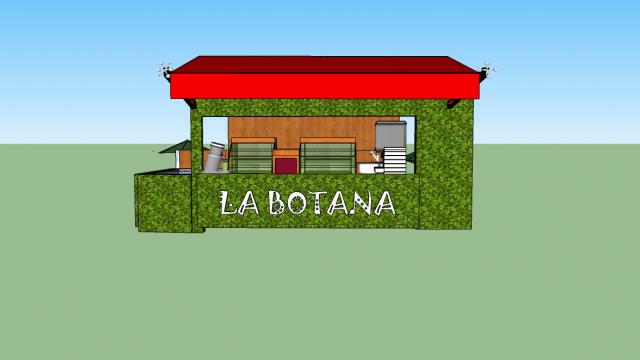
this would be the front and you can see the juice maker and the water maker
this would be the back

you can see the solar panels so the electrical equipment can work
Comments
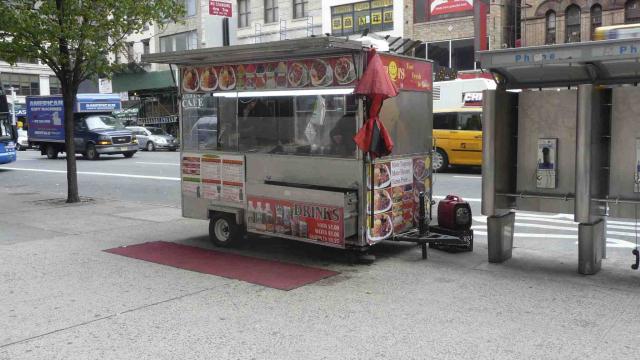
Please go take pictures of outside school where you want this cart to go.
I am happy to see that you are posting some sketches! It's really important to show your design ideas as they develop. Per the comment above, it would be great to see some pictures of the exterior of your school. Also some sketches exploring the best location for the snack stand. (Or is it mobile and moves around with demand?)
Also it is not clear from your post whether or not you actually sent out a survey to your fellow students. If you didn't, you definitely should. Even if the survey is limited to your architecture class. And if you have done a survey, you should post the results.
thanks for posting the pictures. these are helpful. have you thought about the specific location for the cart? will it be on the paving - or on the grass? maybe under the bridge? why would one location be better than another?
be sure to think about how climate will affect the food cart. do you want the cart in the sun? or in the shade? what happens in the winter?
you should check out the site section on the architecture handbook -
http://www.tah2.org/think/site/climate
is there any more development with your project? based on the project schedule, i should be seeing some more developed drawings this week...
You are off to a good start with your project. But it's hard to understand what you're showing us in the great sketch under "Brainstorm" because it's hard to see all of your drawing.
...
For best results, all your images should be horizontal and have a maximum size of 580px by 326 px. The imageviewer will automatically shrink them to fit if they are larger, but if it's a vertical image to start with, it will cut it off, as it has done with yours. Can you please remove this version, re-save it as a horizontal, and try to upload it again?
...
Also, Your teacher and online architect mentor are doing all the talking here! We want to hear from you! It would be very helpful if you could respond and comment here. Tell us more in the description section about what you are thinking so we can better understand your design and ideas. Thanks.
i like the vertical garden element! it's a great idea, but think about how it is used. do you think it will work on all the surfaces you have shown it on? it might get damaged by the users. could you be more selective about your approach?
also - how does the car work? does it fold up? if so, what shape does it fold up into? how do you get into the cart? is it still mobile ( i don't see the wheels in the rendering)?
can you show me a detailed plan of the cart?
Alex, like I mentioned you may want to grow edible vegetables you can use in your smoothies like kale, spinach, wheatgrass. With this vertical garden it won't really be able to fold up anymore. Also it will be more difficult to move but if you have a good location you should be ok. Think about seating, in the spring and fall people are going to want to grab something and relax for a bit after school. Does it have free wifi???? Haha
the seating is a useful addition. it may not exactly be part of the project - but does the furniture need to fold up into the cart for transport as well?
also - do you want to take a stab at designing the furniture? it looks like you might have selected blocks from the google warehouse - but you could think about how the furniture relates to the design of the food cart. can you incorporate any garden elements? maybe a pvc coating for the umbrellas? do the materials relate to the materials used for the cart?
What a good design. However, from a practical standpoint, since you will be serving food, the local codes will probably make you provide some means for washing up, that is a sink, drain, and a water supply. Where would you put these? If you need to have water and a drain, how would you keep the cart portable?
How about an electrical connection? You might consider photocells or a wind turbine or possibly pedals under the stools! Unfortunately, if you do have these, you'll need a place for batteries.
A wonderful project so far. The best part for me is to see the evolution of your ideas.
this project really turned out well. great job!
(i'd want to get a snack there!)