Mackenzie and Lily's Locker

Overview Instructions

Show Hide

That thin metal box at school where you cram all your stuff? Lockers aren't designed for students today. In fact, the design of lockers hasn't changed since the days of your great grandparents!

But in the School of the Future things could be different. Reimagine the design of a 21st century locker you would need as a Maker. A locker you could use to keep all of your stuff for making!

Let's get started on the challenge to redesign your school locker.

We are designing a locker that is effective, cost-efficient, and is appealing. The locker will address all of these needs: easier lock combinations, better storage, updated electronics, and cute designs. To do this we will use the design process which includes the following steps: identify a problem, generate concepts, develop a solution, construct and test a prototype, evaluate the solution, and present a solution.

Collect Instructions

Show Hide

Gather more information about your existing school lockers by taking photos, sketching, conducting interviews, or doing additional research.

Think About

  • What is the purpose of a school locker?
  • How has the way you use a locker changed since you first started school in kindergarten, for example?
  • How many times do you visit and open your locker each day?
  • Do teachers or school administrators have any safety or security concerns about lockers?  What are they?
  • What types of materials is your locker constructed from?

Try This

  • Take photos of a row of your school's lockers.  Open your own locker and take a photo of what's stored inside.
  • Make a list of all the features your locker currently has. (Examples: hooks, air slots, etc.)
  • Make a list of all the items you currently keep in your locker on a typical day.
  • Next to each item, make notes about what 'needs' that item has.  (Examples: my sweaty gym clothes need to kept away from my other things; my iPod needs electricity to be charged; my winter boots need a place to drip dry)
  • Make a list of all the items you wish you could store in your locker, but don’t have room for.
  • Measure the length, height, and depth of your current locker.
  • Measure the length, height, and depth of your backpack, books, coat / shoes, and other large objects you typically keep inside your locker.
  • Measure the width of your school's hallway.  How much of this width is taken up on both sides of the hallway when students stand in front of their open lockers?
  • Read this Washington Post article to learn more about some of the complaints students have with their lockers today.
  • Visit the websites of a few manufacturers to see various types of lockers currently made.  What do you like or dislike about these examples?

mackenzie laney's work for the Collect Information step:

Summary
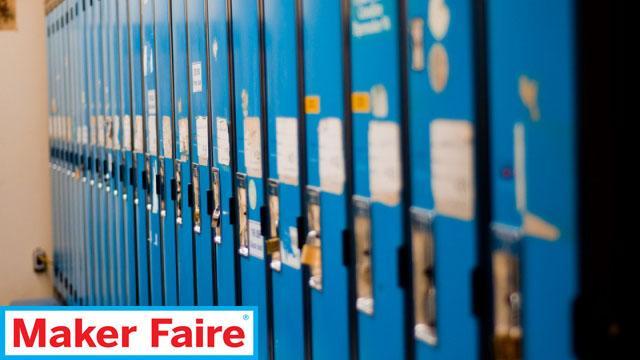
The purpose of a locker is to store possessions during the school day so you do not have to carry everything around all day.
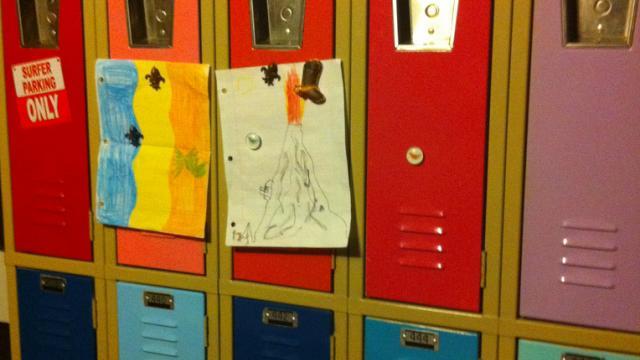
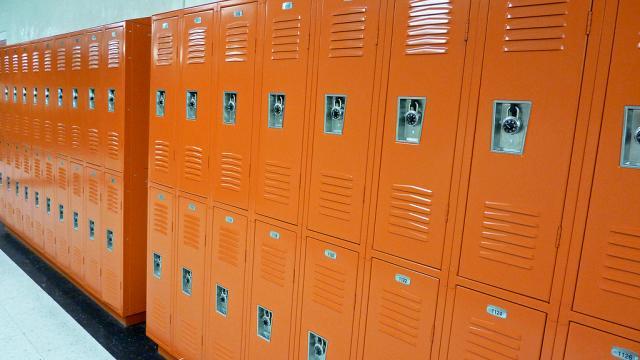
Here is a picture of the lockers at our school. The features include hooks, air vents, and a...
Our lockers are 26.5 inches tall, 10 inches wide, and 14 inches deep. A typical textbook is 11...
Items usually kept in a locker are textbooks, gym clothes, lunches, nothing personal so nothing...
We like the idea of bigger because if we had more room in our lockers we would keep our backpacks...
We dislike the idea of top and bottom lockers because the people with bottom lockers get walked on...
We like the idea of customizable lockers because you can express yourself.

Brainstorm Instructions

Show Hide

Develop sketches or models to help you puzzle through new ideas and solutions.

Think About

  • Make a list of all the things you like about your current locker.  Ask several friends for their opinions.
  • Make a list of all the things you dislike about your current locker.  Ask several friends for their opinions.
  • Think about your locker not just as a metal box, but as another type of container.  What other types of containers do you use each day to store stuff?  (Examples: containers for food, clothing, household items)
  • Many animals, insects, and plants use containers to store things (Example: bees use honeycombs).  Check out some of the images in the Inspiration Gallery for other ideas of strorage units.
  • Keep in mind that your newly-designed locker will be one of many along the hallway.  How will these individual units all fit together?  How will several students use their lockers at the same time without bumping into each other?

Try This

  • Based on the information you collected above, brainstorm a list of special features you’d like your new locker to have.
  • Make lots of sketches to get your early ideas down on paper.  Learn from each different idea. 
  • Consider what materials the locker will be made from.  What materials will be durable against the wear and tear of student use over the years?

mackenzie laney's work for the Brainstorm Ideas step:

Summary
Make a list of all the things you like about your current locker. Ask several friends for their opinions.
We used the concept of bee hives and honeycombs to create this sketch which has separate storage...
We think lockers should have electrical outlets so we can charge our phones and ipods during school.
In this sketch we made the locker taller and wider so that out textbooks will fit better and...
In this sketch we put a mini-fridge and microwave inside each locker so that students can keep...

Develop Instructions

Show Hide

Now's the time to take what you've learned from the steps above and develop your own solution for a new locker.

Try This

  • Use recycled cardboard to make a full-scale or half-scale prototype model of your locker.  You can't really understand if the locker will hold all your stuff, until you make a quick study model.  Don't worry about making a fancy finished model at this time. Instead, use cardstock, scissors, and tape to quickly create the large 3D form. See how it looks. Break off different sections, add new pieces, and try new ideas. Take photos of your model.
  • Sketch or use software such as Google SketchUp, AutoCAD, or Revit to put your ideas on paper.

mackenzie laney's work for the Develop Solutions step:

Summary
We constructed a prototype out of a shoebox to demonstrate our ideas. The prototype is not to scale.
We used a shoebox, cardboard, scissors, and tape to construct our model locker.
Our prototype locker has a mini-fridge, microwave, electrical outlet, and honeycomb storage...
We painted our prototype black to resemble the metal the actual locker will be made of.

Final Instructions

Show Hide

The final step of the design process is to create a more finished model that communicates your ideas to others.

Try This

  • What color or colors will your locker be? What colors have inspired you?  Add colors to the digital model of your locker.
  • What materials will your locker be made of?  Choose materials and details to add to your digital model.
  • Include a human figure in your final locker model, so we can see how big your locker really is.
  • Upload additional images of your finished locker model to the slides for your project.  Write short captions explaining your ideas.
  • Congratulations on solving this design challenge!

mackenzie laney's work for the Final Design step:

Summary
Our final design has a mini-fridge, microwave, electrical outlet, honeycomb storage compartments, a touch-pad lock and customizations such as a white board calendar, chandelier, mirror, and name plate
This is the front of our locker. It has a touch-pad lock and a name plate.
Here is the inside of our locker. It includes a mirror, calender, mini-fridge, microwave, honeycomb...
Storage side of our locker
Inside of the locker door