Wondering about this bus shelter design problem? >>

Show Hide

A shelter is a structure that we may take for granted, but bus shelters also have the potential to make our daily lives easier while also significantly impacting the way our streets look. This design challenge is all about taking something we use regularly and redesign it to improve it. What is missing from the current design of your city's bus shelters? What is it that you intend to change about their design?

For most bus shelters, there aren't many places for people to get warm during the winter. If there is, they don't really warm up your body, instead, they mostly just warm up the top of the head. Also, there isn't enough space for people to sit down, many elderly people take the train or bus, and have trouble going to their destination due to their lack of movement and of age, so the seats could help elderly people sit down as well and rest until their bus approaches. Some bus shelters might have holes on top, and would let people get wet while its raining, so having an oval top so the rain, snow, hail, etc. could make it less harmful for people who are waiting for their bus to approach.. It would be better to have brighter lights so not only the bus driver could see where the bus shelter is, but also for customers to know where they are and to feel more safe. Some people might feel a little insecure around the place they're in while waiting for the bus. Security cameras could be set up around the shelter to make people more safe. These are just some of the features that mostly all bus shelters need, but dont really have. Customers need something thats worth having around their neighborhood and to make them feel as if they're home.

Curious about the Collect Info step of this bus shelter design problem? >>

Show Hide

In this step of the design process, you’ll want to gather as much information as possible about different types of bus shelters. How do people use them? You’ll also want to look at bus stations that have been designed in other countries. Interview bus riders about how they use the current type of bus shelter and what is missing in their design.

Think About

  • What are the basic functions and design elements of any bus shelter?
  • What materials are these shelters made from?
  • What are some things that you really like or hate about Chicago’s current bus shelters?
  • How long will passengers need to typically wait at the bus stop? 

 Try This

  • Make a list of all the different features on an existing Chicago bus shelter. Explain what you’ve learned and post information the information in this step.
  • Use Flickr and Google Images to search "bus shelter." Research different types of bus stops and shelters in different cities around the world. How are these different than Chicago bus shelters?
  • Use Google Maps to view and print out an aerial photograph of your intersection. How far away is the stop from the street corner? How far away should it be?
  • Interview several of your friends and classmates about what they like or hate about the bus shelters you typically use. 
  • Check out this Chicago Tribune article from architecture critic Blair Kamin about the 2003 design of Chicago's bus shelters by a French company.
  • This blog about bus shelter designs have some very interesting ideas from all over the world.

Orlando Hernando's work for the Collect Information step:

Summary
Collecting information isn't as simple as it seems. What I did to collect information was to see what Bus Shelters needed to be improved with.
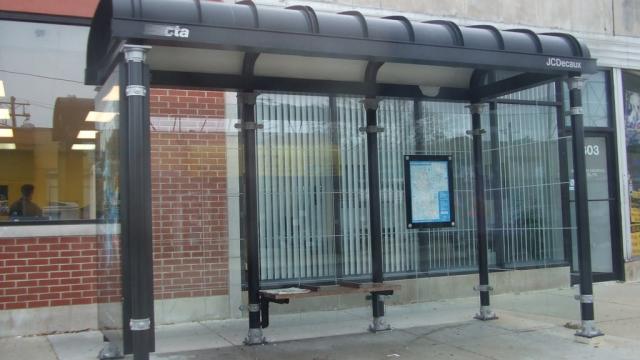
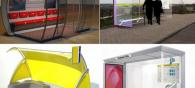
The top of this bus shelter is a good way of describing how the roof for my bus shelter should be....
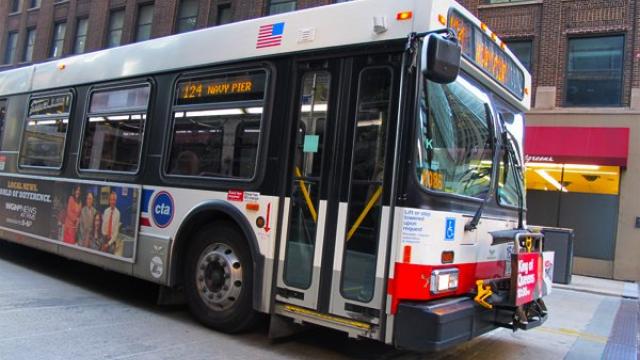
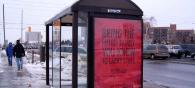
This is just a picture of how Chicago bus shelters look like. This bus shelter is too and in...
The way the seats are set up is a good way of having enough seats for people to sit down; the door...
Location is very important to a bus shelter. The bus shelter that I am trying to make is more of a...
The picture on the top right corner is a good example of how a bus shelter needs light for people...
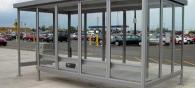
This bus shelter is a great example of how much space the bus shelter that I'm creating is...
This location is a good place to place the bus shelter because it is next to a school, and it'...

Curious about the Brainstorm Ideas step of this bus shelter design project? >>

Show Hide

In the this step of the design process, you’ll want put some early ideas down on paper that show what you've found in the Collect Info step.  You also might take more photos to show specific new ideas you have. 

Make some early decisions about the location, size, features, and materials for your bus shelter. Draw a hand sketch to help you puzzle through new ideas.

Try This

  • Identify a location for your bus shelter on your site near your intersection. Mark this location on a map and think about its proximity to other bus stops, rail stations, or other points of interest near this intersection.
  • Based on what you learned in the Collect Information, make a list of all the features you'd like to have in your design. Edit this list into ‘necessities’ and ‘nice to have’ categories.
  • Using a tape measure and some masking tape, mark out some different footprint options for the shelter. How many people do you need to accommodate? How much space should each person get? How does this compare with the size of the current bus shelters?  Explain your thinking in the description of your project.
  • Draw several quick sketches to get your early ideas down on paper.  Either take a photo or scan and then upload your sketches to your project account. These don’t need to be your final ideas. 
  • Consider what materials the shelter will be made from: what materials will be durable against the weather and the riders who wait there?

Orlando Hernando's work for the Brainstorm Ideas step:

Summary
The way I brainstormed my ideas was to try to make things seem to pop out to the people in the location that i think would best fit the shelter.
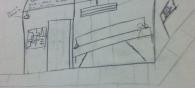
This is a good location to place my bus shelter because it's close to a school. Also, its a...
This is the start of my bus shelter. This isn't actually the final draft of my bus shelter....
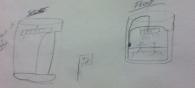
This is another bus shelter that I had in mind. This bus shelter is really good during bad weather...
The over view of where I plan on placing my bus shelter.

Curious about the Develop Solutions step of this bus shelter design project? >>

Show Hide

Now's the time to take what you've learned from the steps above to develop your solution for a bus shelter.

Important! Since DiscoverDesign is about investigating the design process, the other people viewing your project - other students around the country, your teacher, and mentors - want to see how your ideas have changed over time. This means that while you're working on your digital model, you’ll want to be sure to keep re-saving it with a new file name every few days as you work through the steps.

Draw a sketch or use software such as Google SketchUp, AutoCAD, or Revit to illustrate your ideas.  You can upload photos (JPG files) from your SketchUp model, video fly throughs (FLV files) of your SketchUp model, or drawings (DWF files) from AutoCAD.

Try to include

  • One site plan
  • One floor plan
  • At least two elevation or perspective views

Try This

You may use any method you'd like to show your design (pencil, colored pencil, collage, physical models, or digital rendering software).  Here are a few suggestions for drawings and models of your bus shelter:

  • Use cardboard or cardstock to build a rough physical study model or prototype of your shelter. You can't really understand the shape of the shelter until you make a quick study model. Don't worry about making a fancy finished model at this time. Instead, use cardstock, scissors, and tape to quickly create the large 3D form. See how it looks. Break off different sections, add new pieces, and try new ideas. Take photos of your model and upload them to this step.
  • Sketch or use software such as Google SketchUp, AutoCAD, or Revit to get the ideas out of your head to share with others.

Orlando Hernando's work for the Develop Solutions step:

Summary
The way I Develope Solutions was to put all of my ideas that I put on paper, and create it in a digital model.
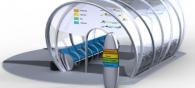
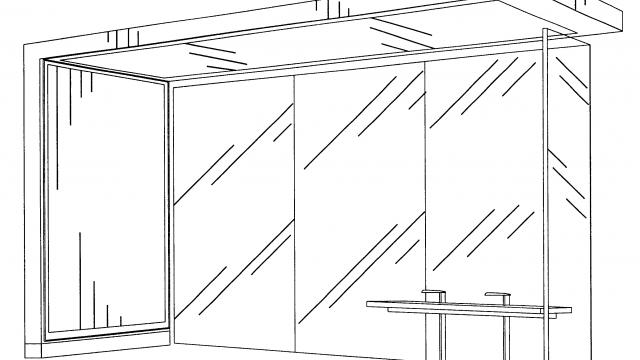
This is the beginning of my bus shelter. The shelter is 12 ft. by 7 ft. The bus shelter may look...
The top view of the bus shelter is for protection of the head for passengers. Some bus shelters...
This is almost the complete version of my bus shelter. The reason I added another door was to let...
The bus shelter is mostly made of glass, except the back and top of the shelter. The reason is...
I have added a tube around the bus shelter to keep the glass in place. Also, I added the map so...
This a Lego model of my bus shelter and the side view of the shelter. The roof of the bus shelter...
This is the front view of my bus shelter. As I mentioned before, it has an oval top for things that...

Curious about the Final step of this bus shelter design problem? >>

Show Hide

The final step of the design process is to create more finished drawings that illustrate your ideas to others. Remember, your explanation text and the types of drawings, images, and models you share need to tell the whole story of your project to someone who may or may not have ever visited your site or even your city.

Continue to collect feedback from your peers, teachers and the online community to help you improve on your final design. Be sure to review and add constructive comments on the work of your classmates and other students who are solving the same design problem. If your ideas change, be sure to explain your thinking and let others know about the new work you have posted to your account.

You might want to share floor plans, elevations, renderings of your digital model, photos of a physical model, or a video animation of your model.

  • Review your design and test it against your original sucess statement that you wrote for the Overview. Does it meet this criteria?
  • Does your final design meet the expectations of the student athletes and athletic director that you interviewed?  If not, you may need to go back to the drawing board and revise your design.
  • Make a list of your ideas, sketches, and study models. For your final design you will want to write and post a short but effective paragraph of your process and the unique solutions you found developed. Tell us about your ideas.
  • Your teacher and architectural mentors will be looking for these things:
    1. originality in your design
    2. your ability to creatively solve the design challenge
    3. the quality of images, sketches, drawings, and models you have uploaded in each of the five design process steps (Overview, Collect Info, Brainstorm Ideas, Develop Solutions, and Final Design).
    4. As your ideas change, be sure to explain your thinking and let others know about the new work you have posted to your account. Go back to the virtual drawing board and revise your project based on the feedback of others.
    5. how well you have written about and explained your thinking in each of the design process steps

Orlando Hernando's work for the Final Design step:

Summary
My Final Design will be a model of a location that might look a good place next to a school or a place where could fit in the middle of the city.
This is a model of my bus shelter in the city. This is an idea of where or how certain things could...
Here's the top view of how the bus shelter would look like around the city and the traffic...
The bus shelter can hold up to 10 passengers inside in order for more people to go inside and...
The bus shelter has glass in order for people to see their bus arriving and also, for heat or cold...

Earn Skill Badges

Twitter Feed