
Overview:
High Tech High School is a big colorless box! I didn't realize this until recently when my architecture major and I went around the school and viewed its four corners with its old paint. Every morning arriving to school, I always see the black colored roof that this school has. So just by looking at the structure itself I'm getting many ideas on what not my technology should look like.
With that said, I'm thinking about first working on the main building. The mall area which is much transited and probably the only area where sunlight comes in should be roofless which would make the area feel free in a way and get more sunlight in. I believe having a garden up in the roof of the main building would very much change the schools look. Having a bit of nature on top of whatever the school is made of would not only give the school life and color; but also give it another space where classes could take place in and students can walk around have a new experience of classes outside of school.
My tech wing would be placed in the bus parking lot next to the school. Deciding its shape seems to be difficult for the moment, but I want sunlight to go through the whole building making it feel open. Knowing the school needs science laboratories, I think part of my tech wing should have science purposes. The school is named High Tech High School so it makes no sense to me that the school only has one lab. The main school has a small carpentry classroom located in the garage and it needs to be put in a bigger space. Any other class that needs space would be moved to this building.
The school's gym is located in another separate building so in order to get there students have to walk between a faculty parking lot and two basketball courts. There's a big problem with this because whenever it rains or snows, the pathway gets flooded and the road to the bottom of the hill gets flooded as well. One way to keep students from getting wet would be to create a park where the faculty parking lot and the basketball courts are. The park would absorb all the rain and snow. Since part of the road is located in the bottom of the hill next to the faculty parking lot where the park is going to be, I've decided to take the entire pavement out from that section and turn the spot into a small pond. I believe this idea of turning these places into a park will not only deal with the flooding issue but it also makes the walk from the gym to the school and from the gym to the school, a fun, dry and entertaining experience.
LROJAS's work for the Collect Information step:
Feedback Questions:
• What do you like and not like about High Tech High School?
• What do you think of the school’s location and the school’s surroundings?
• What does High Tech High School need? (Classrooms, labs, lunch areas, computer room, etc.)
Program:
• In High Tech High School (Main building)
-Classrooms
• In Blue Tech (Technology Wing)
-Parking lot space
-Garden/ crop field
-Laboratories
-Classrooms
-Office space
-Circulation space
-Computer room
-Presentation space
• Park
-Circulation space
-Pond
-Basketball courts
Concept:
The most common technology I see students use during school is their phones. My concept for this project is a motherboard chip of an Iphone. As we know, a motherboard chip is what defines and makes a phone or any other type of technology device smart.
When I look at a motherboard chip, I see the school and our surroundings. In a motherboard chip, data has to go through correct areas in order to process and get results. This is exactly what students do when they come in to school and go to their designated classes. From a top angle, I can spot similarities between the motherboard chip and the school’s blueprint. The chip has vertical and horizontal paths that to me relate to the hallways of this school. This chip may not be symmetrical but it seems organized and reminds me of the placements of class rooms in this school.
LROJAS's work for the Brainstorm Ideas step:
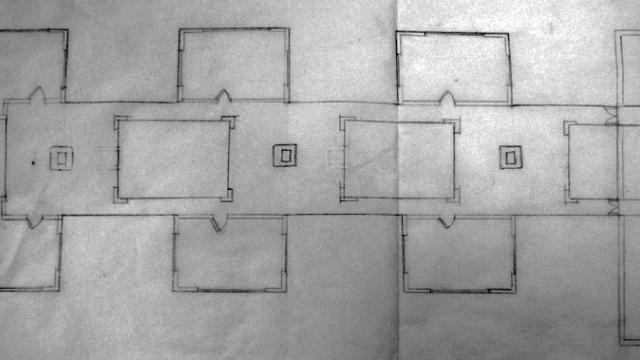
1st Floor Plan of my Tech Wing
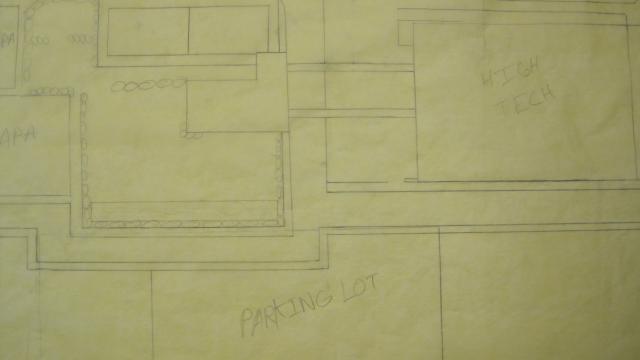
this is my first draft of my project were i worked on the park that i proposed to build in order to address the water issue.
LROJAS's work for the Develop Solutions step:
The student did not provide any content for this step.
LROJAS's work for the Final Design step:
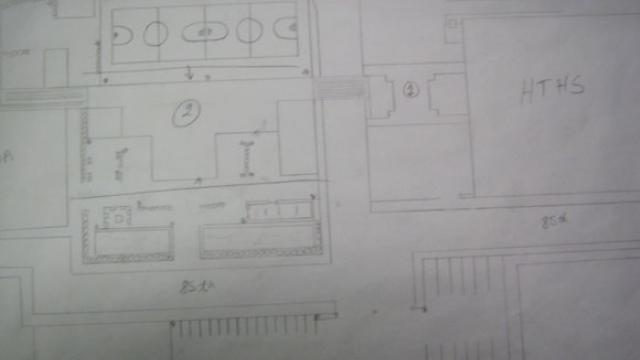
Site Plan: the two buildings (labeled 1 & 2) are my tech wing for the school.
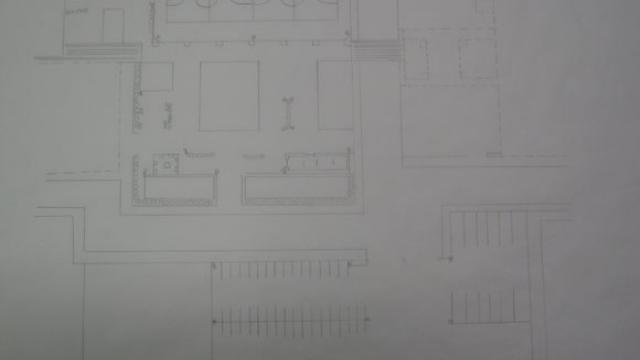
This site plan shows everything under 20 ft drawn with a line and everything over 20 ft drawn with dashed lines.
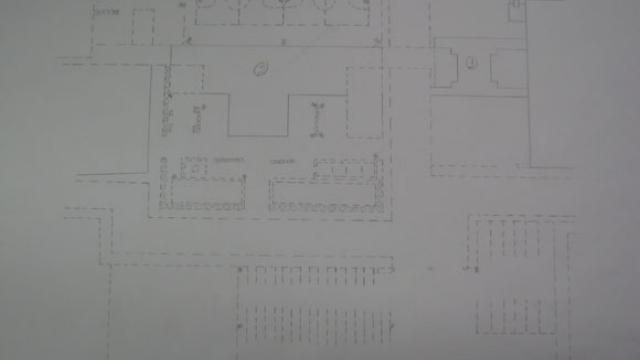
This site plan shows everything over 20 ft drawn with a line and everything under 20 ft drawn with dashed lines.

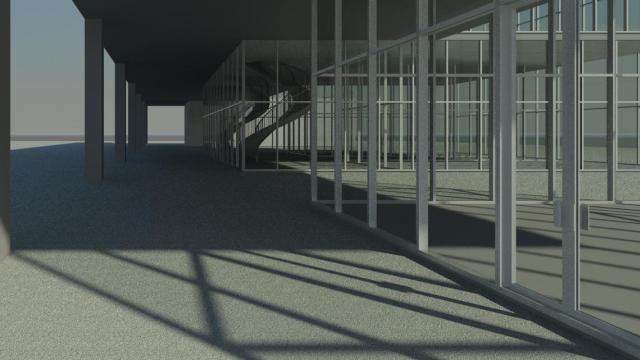
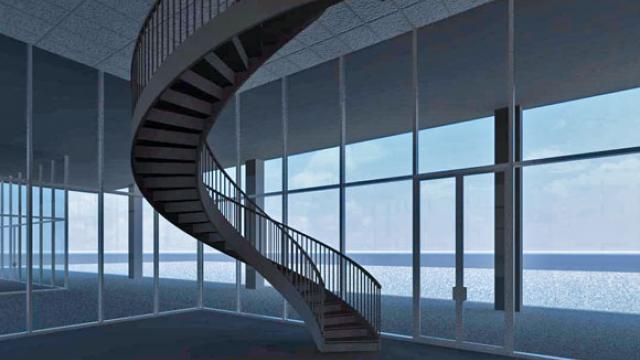
Here is an Elevation, Section and Floor Plan of Tech Wing 1.
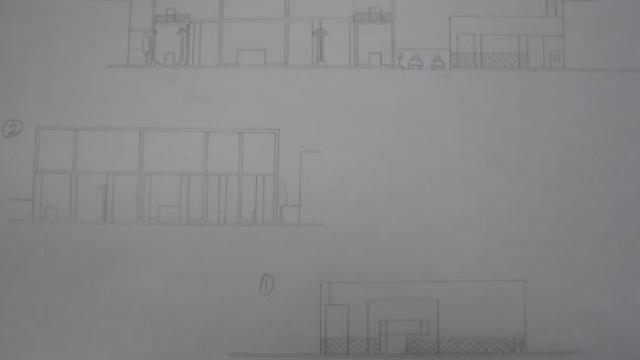
Elevations of Tech Wing 2 and an Elevation of Tech Wing 1 in the bottom.
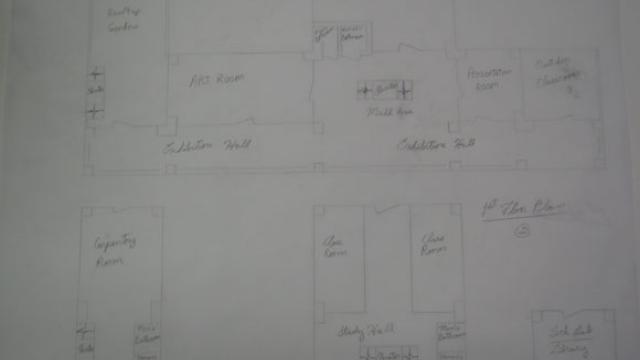
1st and 2nd Floor Plan of Tech Wing 2.
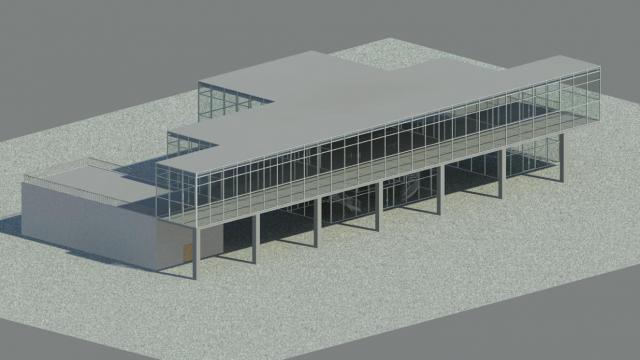
3D render of building 2
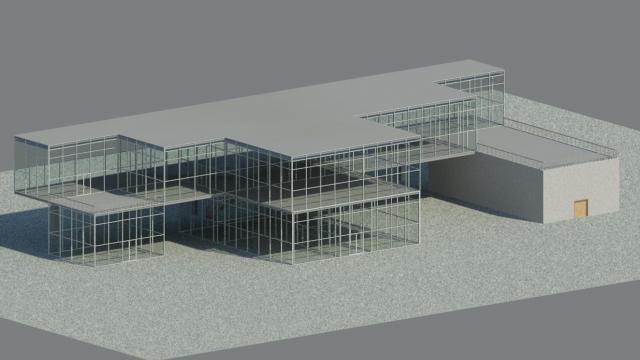
3D render of building 2
3D render of building 2
3D render of building 2
I've gotten through three designs in order to get my final. My first design was a representation of the inside structure of classes outside of the school's walls. It represented how the hallways of school can continue on out along with classrooms. I liked the idea but then decided to try designing a new idea. With relating to my last design, i filled in the wholes- parts that were empty space between my building's classroom- and came up with four buildings placed out in the parking lot which is converted into a park. These buildings seemed to be placed great because it didn't challenge my concept and it didn't change the regular path of students when walking down to the gym and the school. The only problem of having these four buildings separated outside was that students would have to be putting up their coats on in the winter for short amounts of time. I addressed this problem by building a second floor which will go on top of the buildings, making them connect with each other on top. That was how i got to my last design. My tech wing 2 is in the middle of the park which has a pond where the road used to be -there is still a road that goes around the park- and the basketball courts which around it has a running track for students to use. In tech wing 2 you will find the science lab, the Carpentry room, Art room, a rooftop garden and an outside classroom, a Presentation Room, Computer Lab/Library, and two classrooms.Tech wing 1 is basically a short representation that i wanted to keep from my first design. It is An extension of the school's hallway that holds one classroom in middle of them on the small parking lot next to the school. the hallways lead people up to an elevator which brings them to ground level where their walk starts towards the second building or the gym. This is my Blue Tech which i believe was a good experience working on. I got to learn about my school and ways i could solve some issues it had.
Comments
Wow -you are off to good start. You have identified many problems you want to solve with your new building. You will want to keep a check list of these problems so they do not get lost OR if your ideas change OR there are simply too many things to tackle ; then you can keep score and identify WHY some things changed. Things always change.
A bit of language issue. The roof is realy made of layers. Some of your layers will be "permiable" but not all of the layers. If all of the layers are permiable then the roof leaks! If you are collecting water off of the roof for your plants perhaps you can use it in your toilets too? Then you could use the rain water all year round? Which would be most scientific? most freindly? plants or toilets? Or both?
I am excited for you to use color on your building. There is much to discover about color. Some colors can be hot or cold to touch or to see. colors can be used to make the building look smaller or larger. Some colors have associations . (the red coats are coming!) Color is not used enough! I think.
Maybe you can collect photo images that will represent each of the problems you want to tackle. already you have a "book".
Great start, like the pics, but can you please put up notes :)
With your photos and trip to the roof what do you think? Do you likeing being on the roof? How far can you see? on the roof? on the ground? Do you think the bus parking lot is still the best place for your addition? Why? When you put your second floor over the busses will your floor still line up with the existing building? will your bridge need to slope to accomodate two levels? Do you want the bridge to be the most intersting part of your building?
Good job so far Luis. Make sure to include comments when uploading your images. Looking through them it's hard for me to understand what you're trying to convey. Remember that when people visit your project page, chances are that they are unfamiliar with the site location so you must make your images clear and concise. Also consider the formatting of the website when posting images. It may be more effective to post single images of important views so that they are easier to view.
At this stage in the process you should have most of the ingredients necessary to begin the design process: analysis of site, a preliminary concept, and a program outline. Jump right in by creating bubble diagrams showing relationships of spaces for the proposed addition, diagrams depicting the relationship of your addition to the existing school, and developing your concept in regard to its relationship to the context of the site and your pre-defined program. Don't be concerned with the neatness of your sketches at this point. This phase of the design process is about allowing your ideas to flow freely from your mind to the paper.